> ## Documentation Index
> Fetch the complete documentation index at: https://docs.tabby.sa/llms.txt
> Use this file to discover all available pages before exploring further.

# Shopify Snippets

> Add Tabby promotional snippets to your Shopify product and cart pages.

Tabby snippets let your customers know they can split their payments with Tabby in your store. Snippets appear on the product and cart pages and may help improve conversion.

<Warning>
  <div>
    <span style={{ textDecoration: 'none', fontWeight: 'bold' }}>Please note that snippets alone do not activate Tabby as a payment method in your store and don’t affect payment processing. Before adding snippets, make sure Tabby is already integrated and visible on your checkout page. </span>
  </div>
</Warning>

## Adding Tabby Snippets on Product Pages

Here you may see a video on **How to add Tabby snippet to product pages on Shopify**:

<video controls alt="How to add Tabby snippet to product pages on Shopify" className="rounded-xl w-full" src="https://mintcdn.com/tabby-26277sa/fJVMkzMpWAVssPgF/images/shopify-snippet-app-pdp.mp4?fit=max&auto=format&n=fJVMkzMpWAVssPgF&q=85&s=b076ae25de41ea1dbc237cde0d270fad" data-path="images/shopify-snippet-app-pdp.mp4" />

1. In your Shopify admin, go to **Online Store → Themes**.
2. Click the **Customize** button on your current theme.
3. At the top of the screen, click **Home page**, then choose **Products → Default product**.
4. In the left-side menu, add a block, click **Apps** and choose **Tabby Installments**.

<Warning>
  <div>
    <span style={{ textDecoration: 'none', fontWeight: 'bold' }}>If your theme doesn’t allow adding a block, please navigate to </span>
    <a href="#manual-snippet-installation">Manual Snippet Installation</a>
  </div>
</Warning>

5. Drag the **Tabby Installments** block to a desirable position — ideally just below the price.
6. Click **Save** and check your storefront to make sure the snippet appear properly.

If the installments don’t display correctly, your theme may not be fully compatible with default Tabby snippets. In that case, we recommend using “No-price” snippets, which don’t show installment amounts.

To activate “No-Price” snippets, please click on the **Tabby Installments** block and switch the **Enable “No-price” Snippet** toggle to the **on** position. Don't forget to save the changes.

## Adding Tabby Snippets on Cart Page

Here you may see a video on **How to add Tabby snippet to cart page on Shopify**:

<video controls alt="How to add Tabby snippet to cart page on Shopify" className="rounded-xl w-full" src="https://mintcdn.com/tabby-26277sa/fJVMkzMpWAVssPgF/images/shopify-snippet-app-cart.mp4?fit=max&auto=format&n=fJVMkzMpWAVssPgF&q=85&s=8ccaed4c7d7a791700f2c7b4e9ab5462" data-path="images/shopify-snippet-app-cart.mp4" />

1. In your Shopify admin, go to **Online Store → Themes**.
2. Click the **Customize** button on your current theme.
3. At the top of the screen, click **Home page**, then choose **Products → Cart**.
4. In the left-side menu, add a block, click **Apps** and choose **Tabby Cart Page**.

<Warning>
  <div>
    <span style={{ textDecoration: 'none', fontWeight: 'bold' }}>If your theme doesn’t allow adding a block, please navigate to </span>
    <a href="#manual-snippet-installation">Manual Snippet Installation</a>
  </div>
</Warning>

5. Drag the **Tabby Cart Page** block into a suitable spot.
6. Click **Save** and verify that the snippets appear correctly on the storefront.

If installments are incorrect, you can switch to a simplified "No-price" version of the snippet.

To activate "No-price" snippets, please click on the **Tabby Cart** block and switch the **Enable “No-price” Snippet** toggle to the **on** position. Don't forget to save the changes.

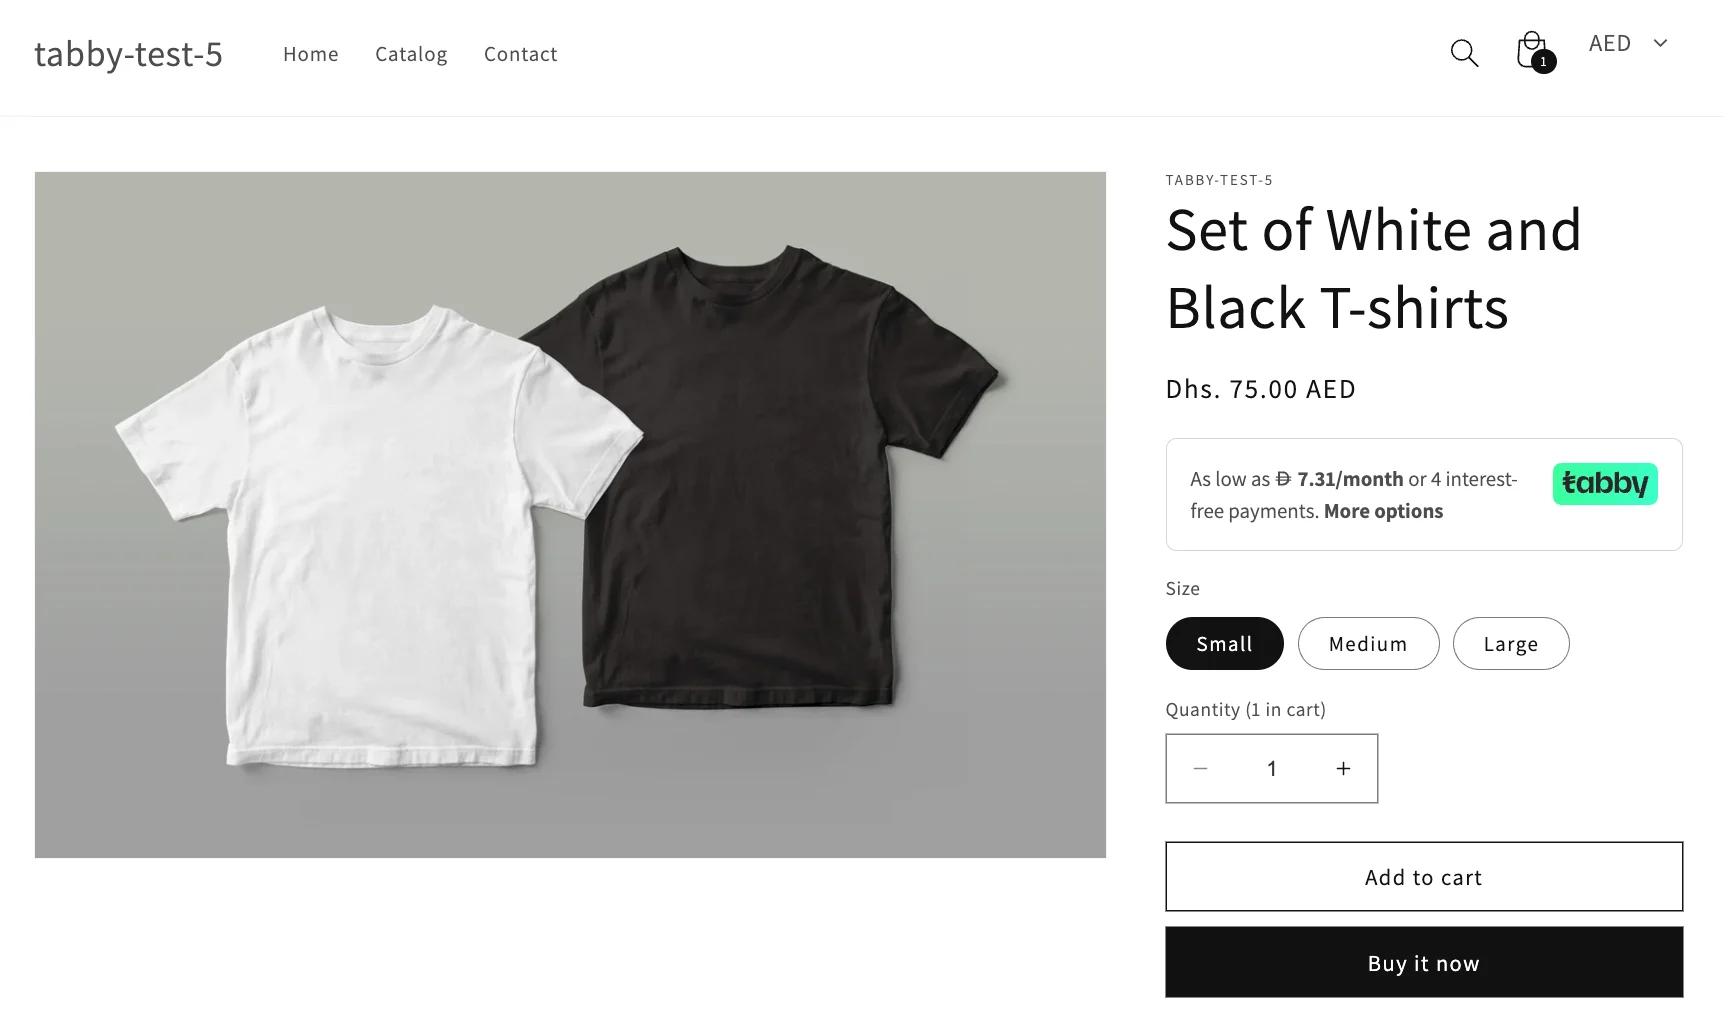
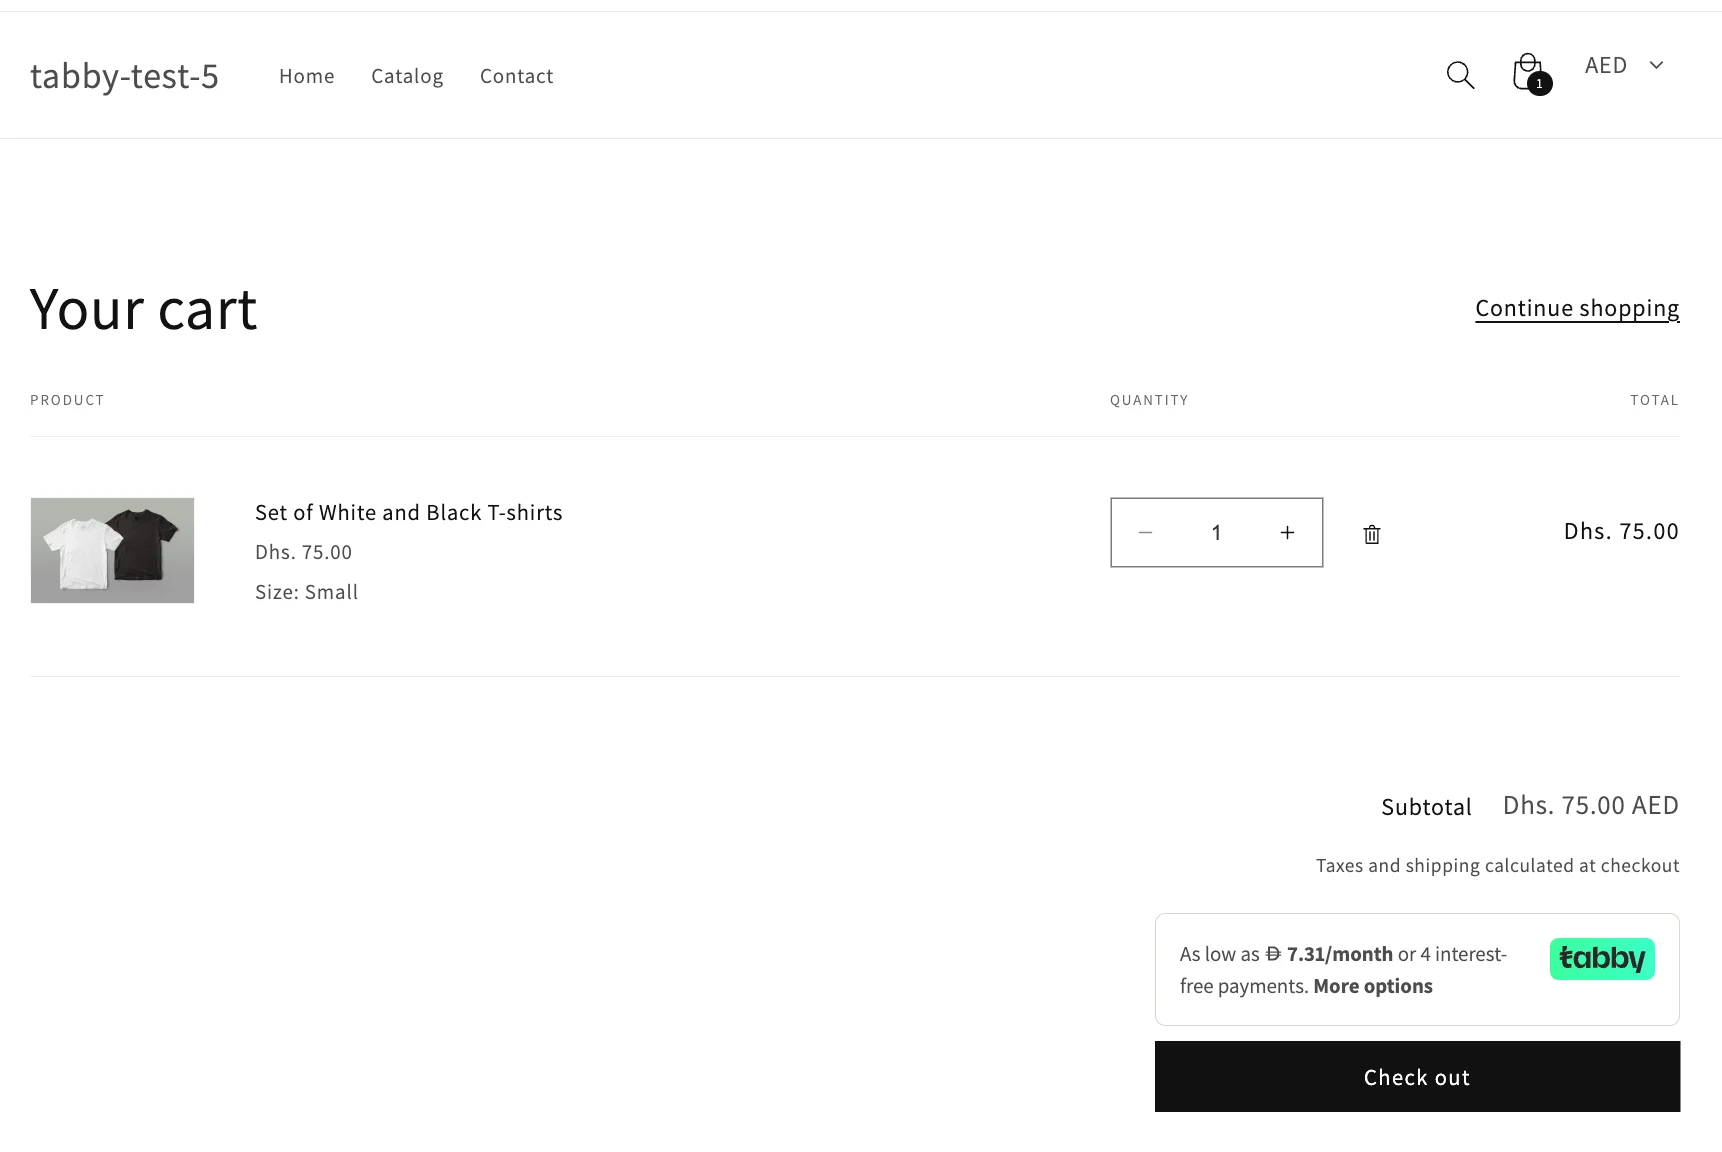
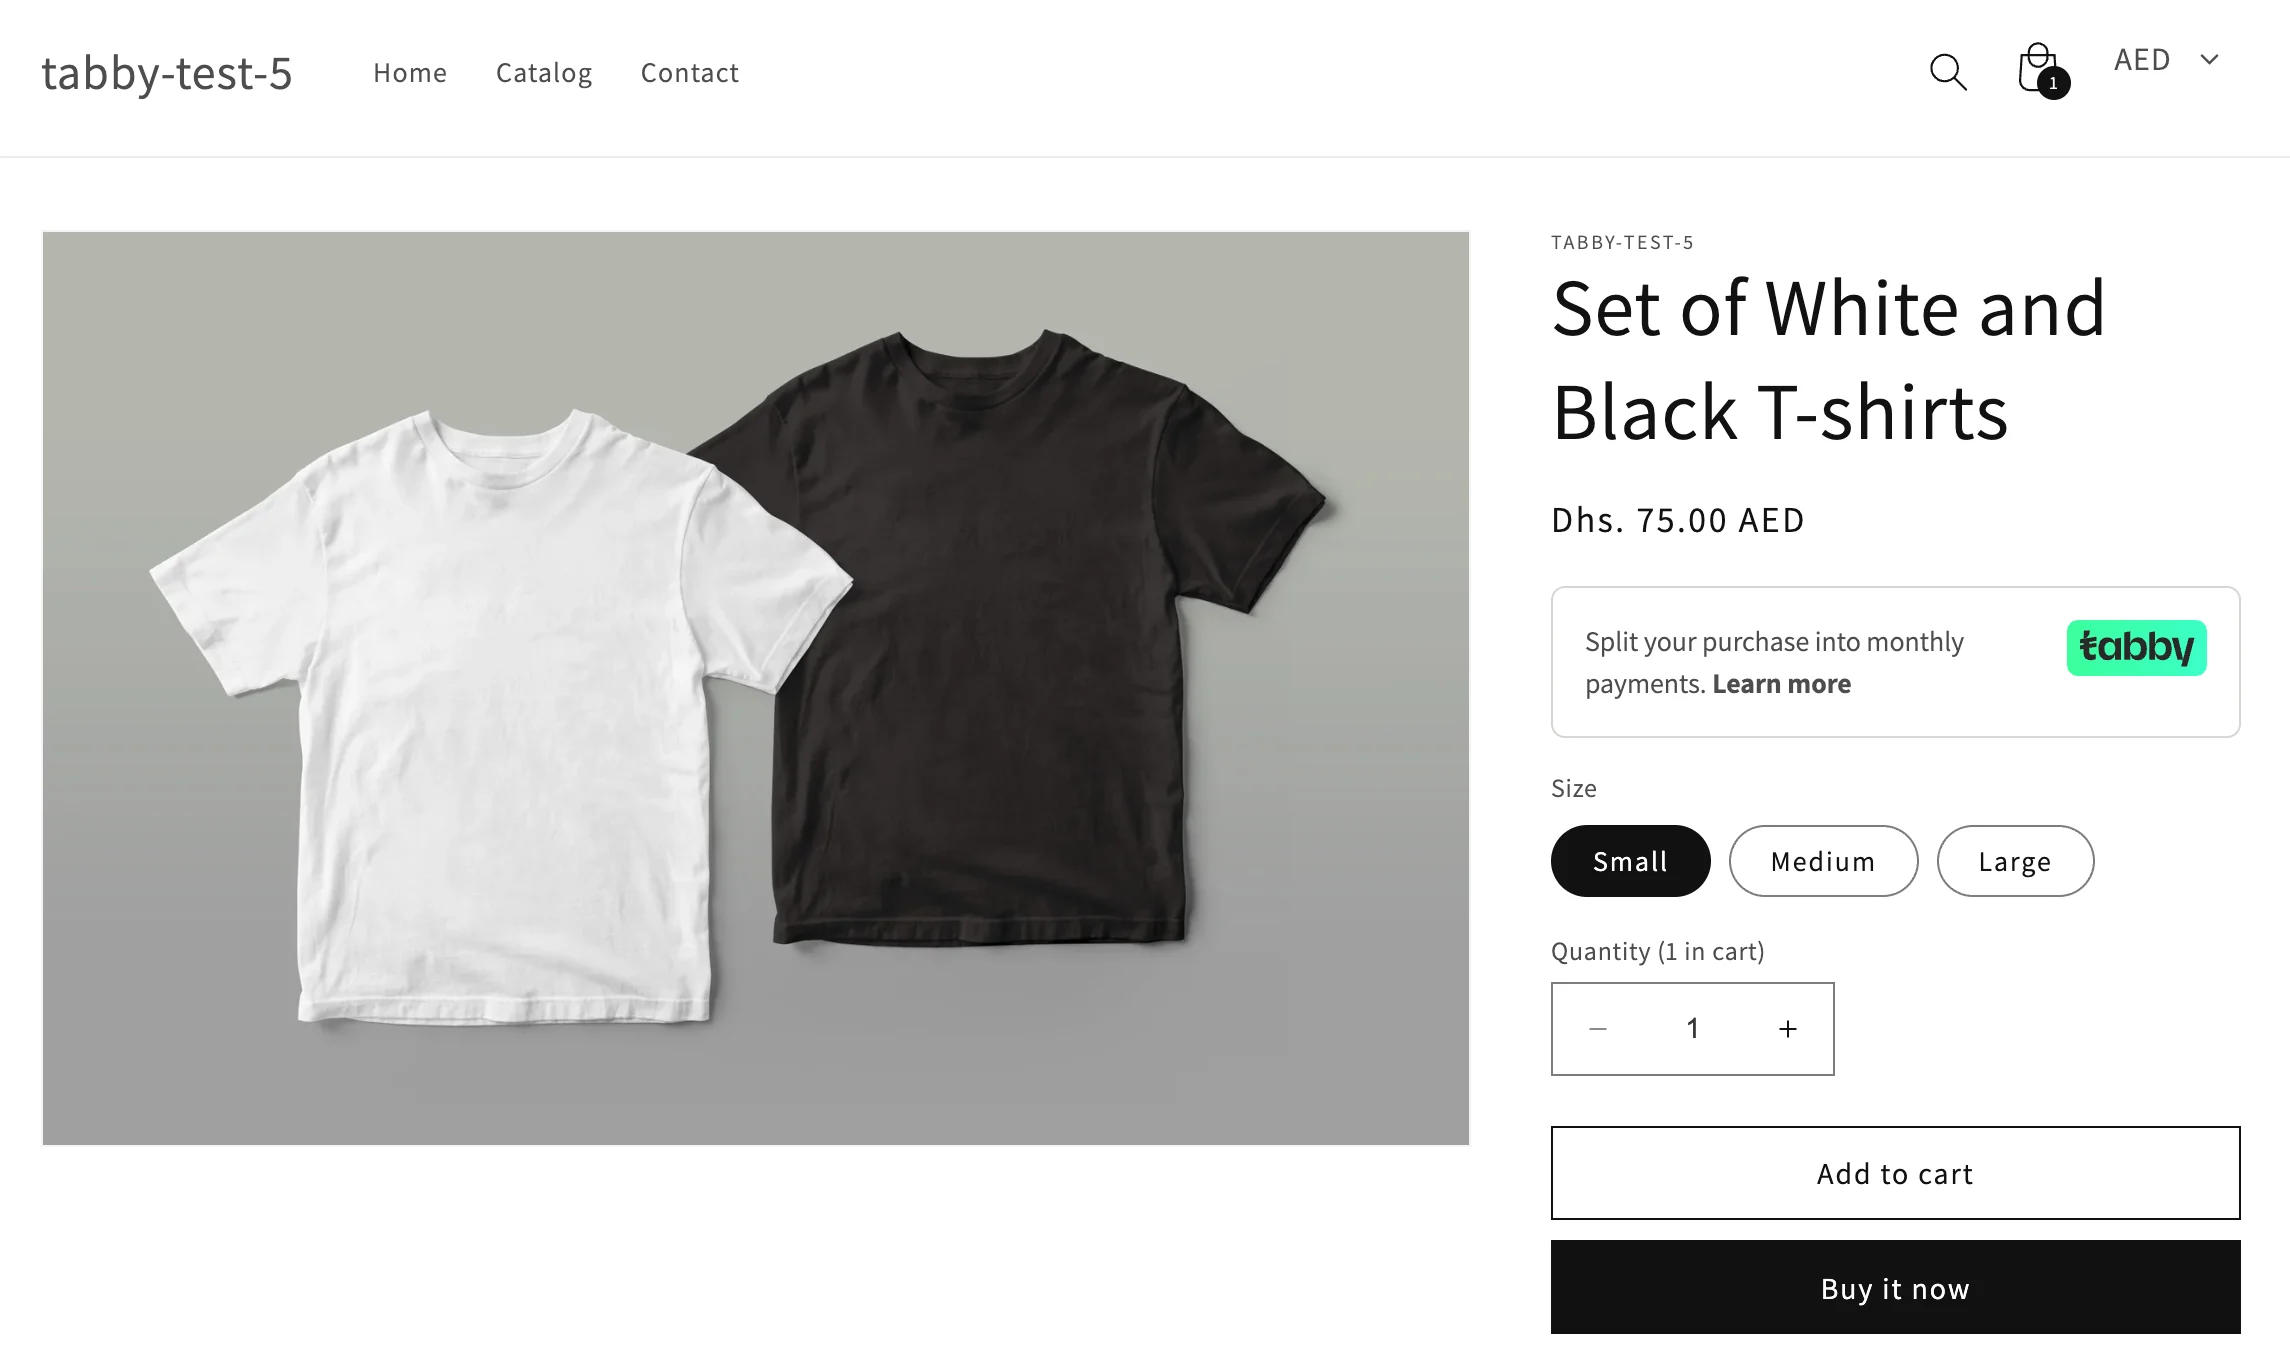
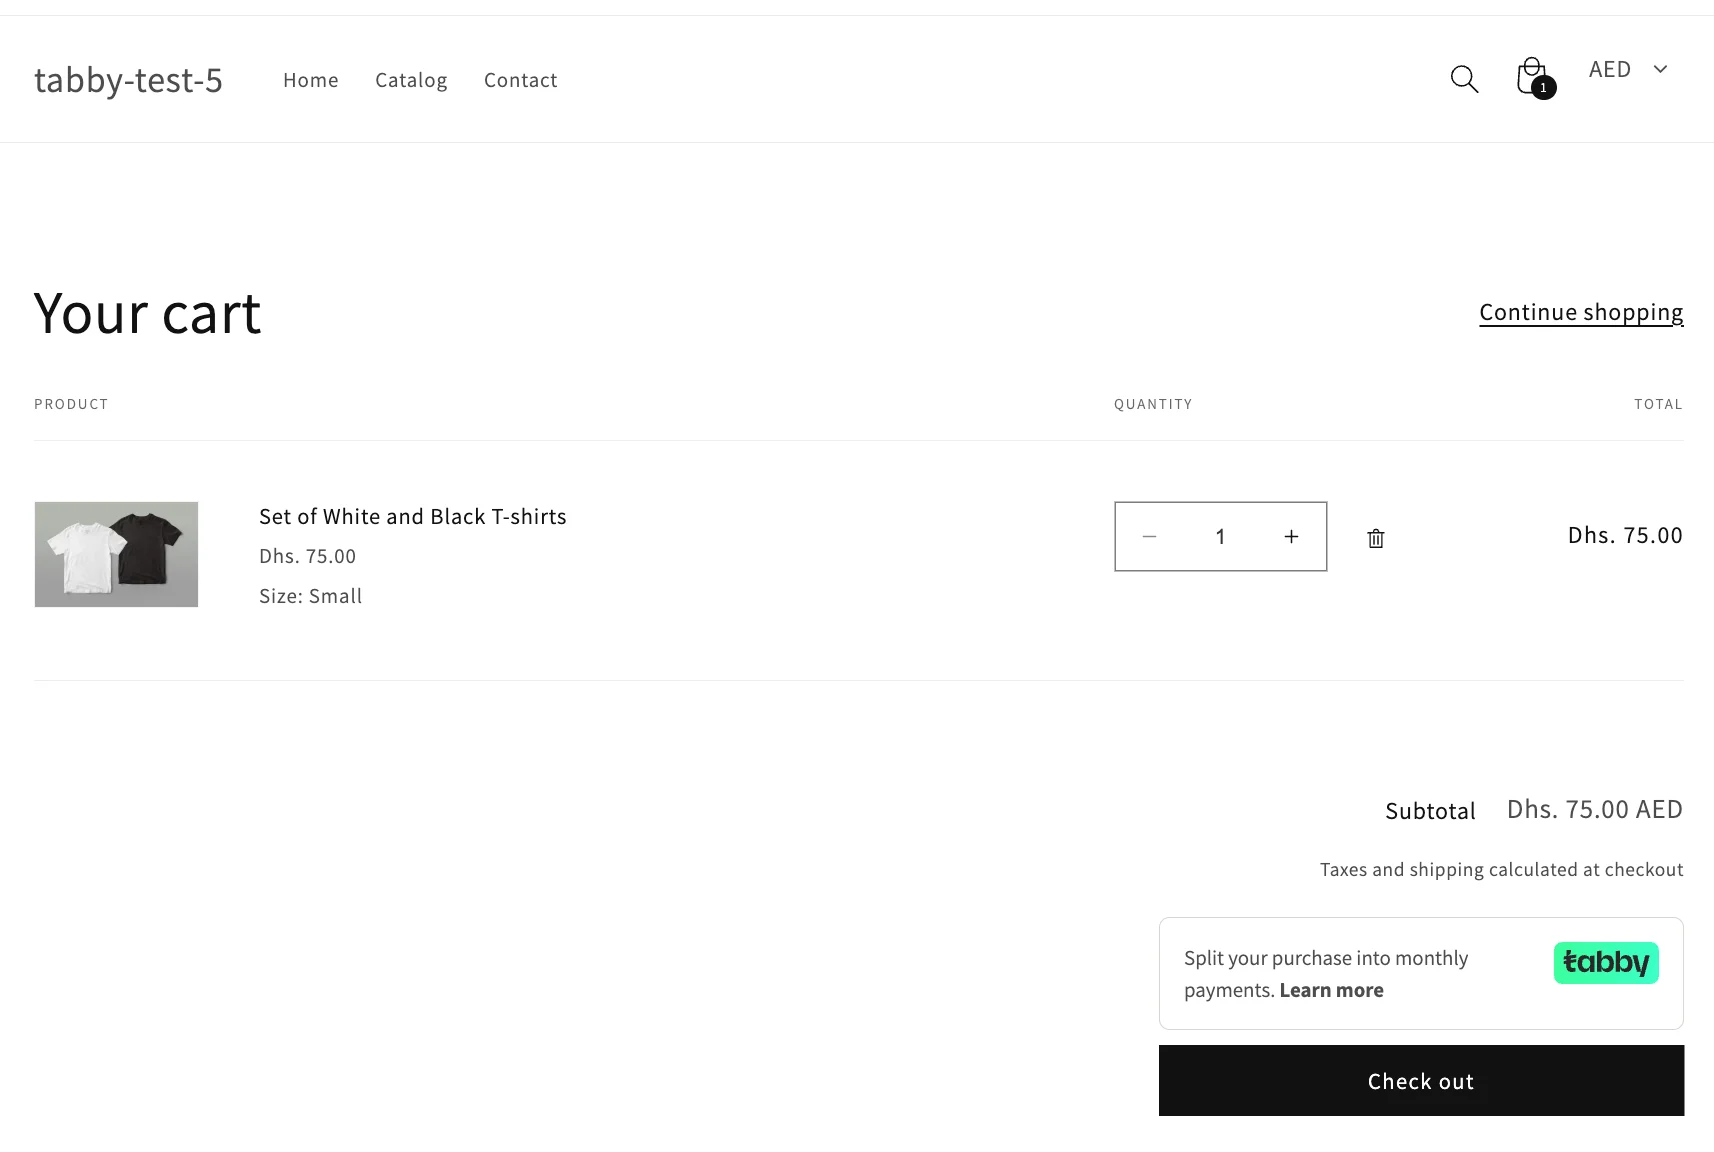
This is how the snippets look on the storefront:

<div className="grid grid-cols-2 gap-4">
  <div>
    <h4 className="mb-2 font-semibold">Default snippet</h4>

    <img alt="Tabby snippet on product page" className="rounded shadow" src="https://mintcdn.com/tabby-26277sa/fJVMkzMpWAVssPgF/images/shopify-snippet-new-aed.png?fit=max&auto=format&n=fJVMkzMpWAVssPgF&q=85&s=3044084281c576f77645c5b54c16e226" width="1724" height="1028" data-path="images/shopify-snippet-new-aed.png" />

    <img alt="Tabby snippet on cart page" className="rounded shadow" src="https://mintcdn.com/tabby-26277sa/fJVMkzMpWAVssPgF/images/shopify-snippet-cart.png?fit=max&auto=format&n=fJVMkzMpWAVssPgF&q=85&s=62b39f332343e6939caa9f2e0fde2593" width="1722" height="1152" data-path="images/shopify-snippet-cart.png" />
  </div>

  <div>
    <h4 className="mb-2 font-semibold">"No-price" snippet</h4>

    <img alt="Tabby no-price snippet on product page" className="rounded shadow" src="https://mintcdn.com/tabby-26277sa/fJVMkzMpWAVssPgF/images/shopify-snippet-no.png?fit=max&auto=format&n=fJVMkzMpWAVssPgF&q=85&s=c834dac83eb40f3656414a765e2715d3" width="2290" height="1372" data-path="images/shopify-snippet-no.png" />

    <img alt="Tabby no-price snippet on cart page" className="rounded shadow" src="https://mintcdn.com/tabby-26277sa/fJVMkzMpWAVssPgF/images/shopify-snippet-cart-no.png?fit=max&auto=format&n=fJVMkzMpWAVssPgF&q=85&s=df0e46f4b76cee81cbacd9df9e713d61" width="1714" height="1152" data-path="images/shopify-snippet-cart-no.png" />
  </div>
</div>

## Manual Snippet Installation

Some Shopify themes may not support adding blocks on product pages. In such cases, the Tabby snippets need to be added manually. For this, you should create a file with the snippet code in your theme and render it on your product page.

### Step 1. Create a file

1. In the Shopify Admin panel, click **Online Store** → **Themes**
2. On the Themes page, click the **“…”** → **Edit code**
3. In the navigation menu on your left, click the **Snippets** folder and click the symbol of adding a new file
4. Name it **tabby-installments.liquid**

### Step 2. Add code

1. Copy one of the following codes and paste it into the file you've created.

   We offer two variants of snippets: **default snippets** with installments and **"No-price" snippets**. The "No-price" code should be used if the default snippets don't work properly, which may be the case for some themes. Please try the "default" code first.

<span id="default-code" />

**Default Snippet Code**

```HTML theme={"dark"}
{%- assign lang = localization.language.iso_code -%}
{%- assign currency = cart.currency.iso_code -%}
<div id="TabbyPromo"></div>
<script>
  (function () {
    const productData = {{ product | json }};
    const currency = '{{ currency }}';
    const lang = '{{ lang }}';
    const publicKey = 'YourAPIkey';
    function getSelectedVariantPrice() {
      const variantId = document.querySelector('[name="id"]')?.value;
      if (!variantId) return null;
      const variant = productData.variants.find(v => v.id == variantId);
      if (!variant) return null;
      return variant.price / 100.0;
    }
    function refreshTabby() {
      const price = getSelectedVariantPrice();
      if (!price) return;
      const promo = document.getElementById('TabbyPromo');
      if (promo) promo.innerHTML = '';
      const merchantCode = (currency === 'AED') ? 'default' :
                           (currency === 'SAR') ? 'ksa' :
                           (currency === 'KWD') ? 'KW' : undefined;
      const config = {
        selector: '#TabbyPromo',
        currency,
        price,
        lang,
        publicKey
      };
      if (merchantCode) config.merchantCode = merchantCode;
      new TabbyPromo(config);
    }
    const script = document.createElement('script');
    script.src = 'https://checkout.tabby.ai/tabby-promo.js';
    script.async = true;
    script.onload = () => {
      refreshTabby();
      const variantSelector = document.querySelector('form[action*="/cart/add"] select');
      if (variantSelector) {
        variantSelector.addEventListener('change', refreshTabby);
      }
      const variantInput = document.querySelector('input[name="id"]');
      if (variantInput) {
        const observer = new MutationObserver(() => {
          refreshTabby();
        });
        observer.observe(variantInput, { attributes: true, attributeFilter: ['value'] });
      }
    };
    document.body.appendChild(script);
  })();
</script>

```

<span id="no-price-code" />

**No-price Snippet Code**

```HTML theme={"dark"}
{%- liquid
  assign locale = localization.language.iso_code
-%}
<div id="TabbyPromo"></div>
<script>
  (function() {
    const script = document.createElement('script');
    script.src = 'https://checkout.tabby.ai/tabby-promo.js';
    script.async = true;
    script.onload = () => {
      const locale = '{{ locale }}';

      new TabbyPromo({
        selector: '#TabbyPromo',
        locale,
        publicKey: 'yourApiKey', // specify your apiKey, it should be a string
        merchantCode: 'yourMerchantCode', // enum: "default" for AED, "ksa" for SAR, "KW" for KWD
      }); 
    };
    document.body.appendChild(script);
  })();
</script>
<style>
  #TabbyPromo div:empty, #TabbyDialogContainer div:empty {
    display: block;
  }
</style>
```

2. Check the variables in the code:
   *For default snippet*: Put your **Public API Key** in the line 9 replacing **YourAPIkey** text.
   *For No-price snippet*: Put your **Public API Key** in the line 16. In the line 17, put your **merchant code** based on your store currency, instead of the text **yourMerchantCode**.
   Please note that you can find your Public API key in the Tabby Dashboard or in the initial email from your Tabby manager.

3. Save the changes.

### Step 3. Render the Snippet

1. First, find the file in your theme that is responsible for the page layout.
   The exact file name may vary depending on the theme, but it's typically located in the **Sections** folder.
   For product page, the most common file names are *product.liquid*, *main-product.liquid*, *price.liquid*, etc.
   For cart page, it may be *cart.liquid* or one of the files included in *templates/cart.json* (e.g., *main-cart-items.liquid*, *cart-footer.liquid*)
2. Once you find appropriate file in your theme, place the following command near the price element:

```
{% render 'tabby-installments'%}
```

3. Click Save and check if the snippets appear correctly in the desired place on the storefront.

If you notice any issues with the content of the default snippet, go back to <a href="#step-2-add-code">Step 2</a> and replace the code in the **tabby-installments.liquid** file with the “No-price” option. After saving the changes, the "No-price" snippets should appear on the storefront.