
1
2
3
Tabby on Checkout
Use the standard Tabby naming and Logo to present Tabby method at your checkout:Recommended: Checkout Snippet
Display the Checkout snippet under the Tabby payment method when it is selected. The snippet shows the actual cost breakdown for the order amount and the key benefits, and keeps this information always up to date: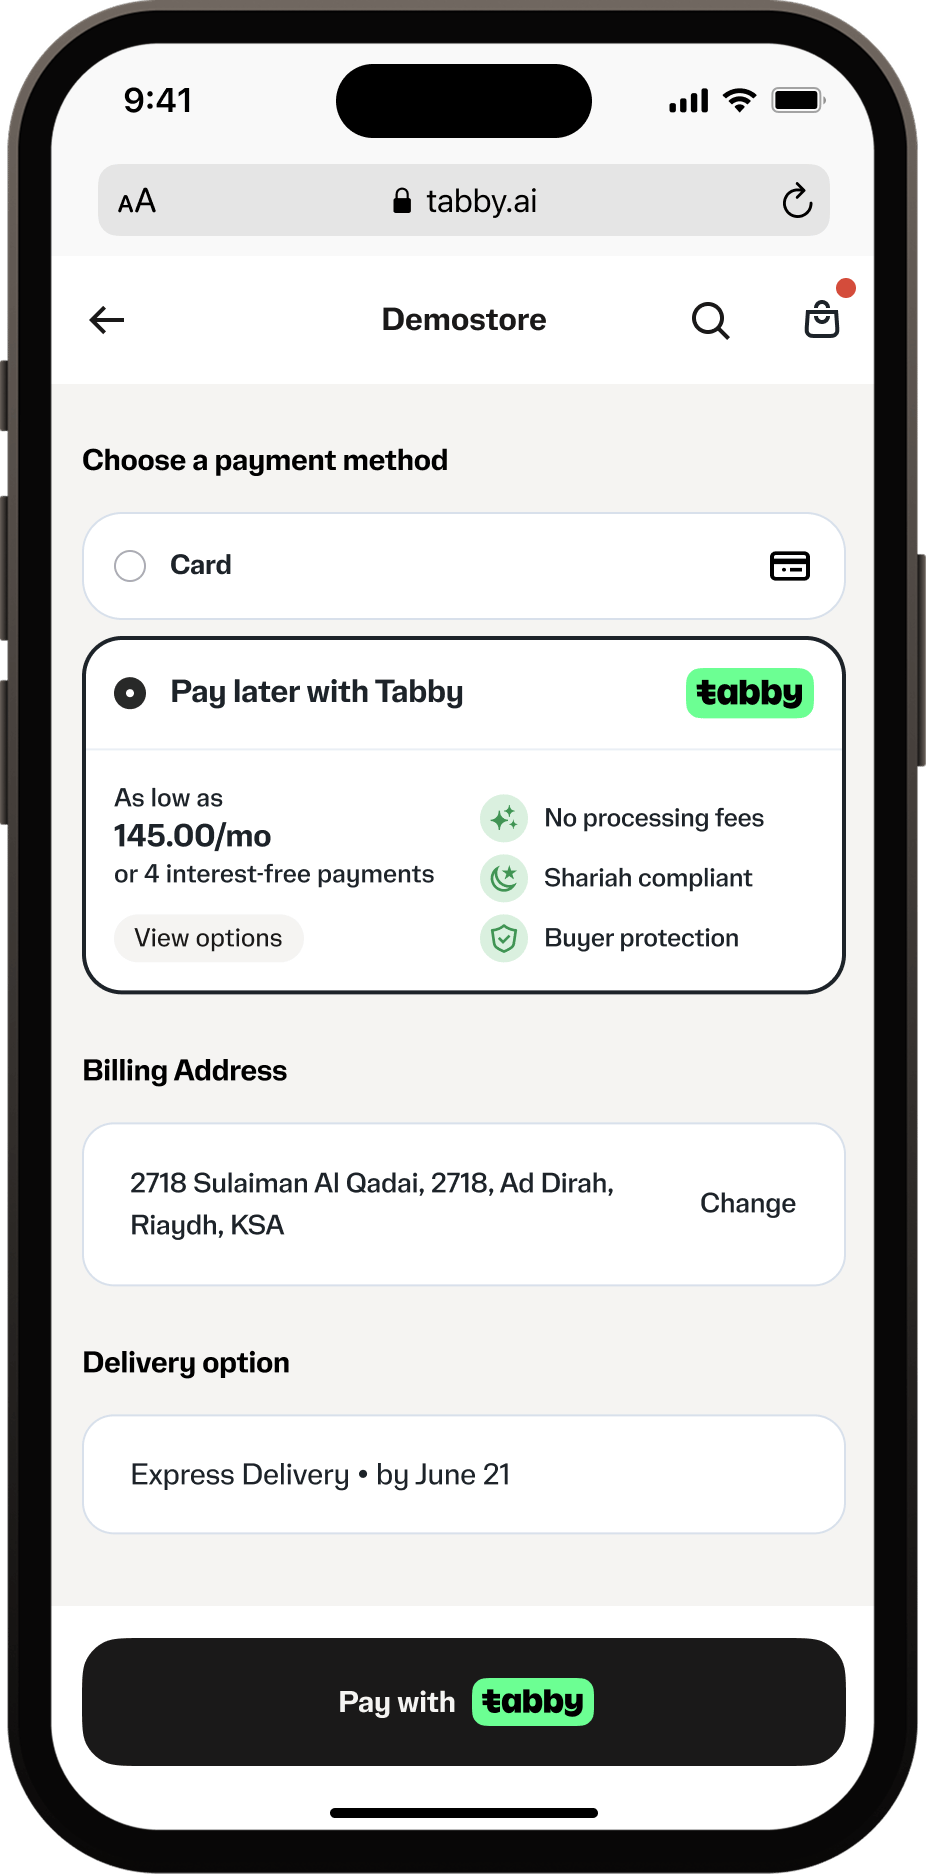
Alternative: Payment Method Description
If the Checkout snippet cannot be embedded (e.g., due to checkout platform constraints), add a static description under the payment method name showing the cost breakdown:- XX.XX is the monthly payment amount with your store currency: order total × 1.015 / 4
- Learn more should open the Tabby pop-up with the payment schedule
Background Pre-scoring Check
Background pre-scoring (also known as eligibility check) determines whether a customer is eligible to use Tabby before displaying it as a payment option. This check takes place at your checkout when the total amount and customer contact details are known.For detailed implementation including when to perform checks, error handling, caching strategies, rejection messages, and complete code examples, see: FAQ - Eligibility Check Best Practices
Quick Implementation
CallPOST /api/v2/checkout endpoint with minimal required data (but more is better): amount, currency, buyer.email, buyer.phone, and merchant_code:
This minimal payload is accepted for the background pre-scoring call only. The session you create when the customer clicks “Place order” must carry the full payload with all required fields.
Use the base URL for your region:
api.tabby.ai (UAE) or api.tabby.sa (KSA). See Base URLs.Response handling
Check thestatus field to determine eligibility:
status: "created"→ customer is eligible, show Tabby;status: "rejected"→ customer is not eligible, hide Tabby or show rejection message.
configuration.products.installments.rejection_reason (it is null in created responses). In rejected responses configuration.available_products comes back empty — which is also why there is no web_url to redirect to.
Possible rejection_reason values
Here are possible"rejection_reason" values and corresponding messages to show to customers:
Best Practices
Key principles:- Fail-safe approach - always default to showing Tabby on API errors or timeouts
- Loading states - show appropriate UI feedback during checks
- Background checks - perform eligibility checks when customer enters checkout or cart amount changes
- Rejection handling - hide Tabby (recommended) or show rejection message.
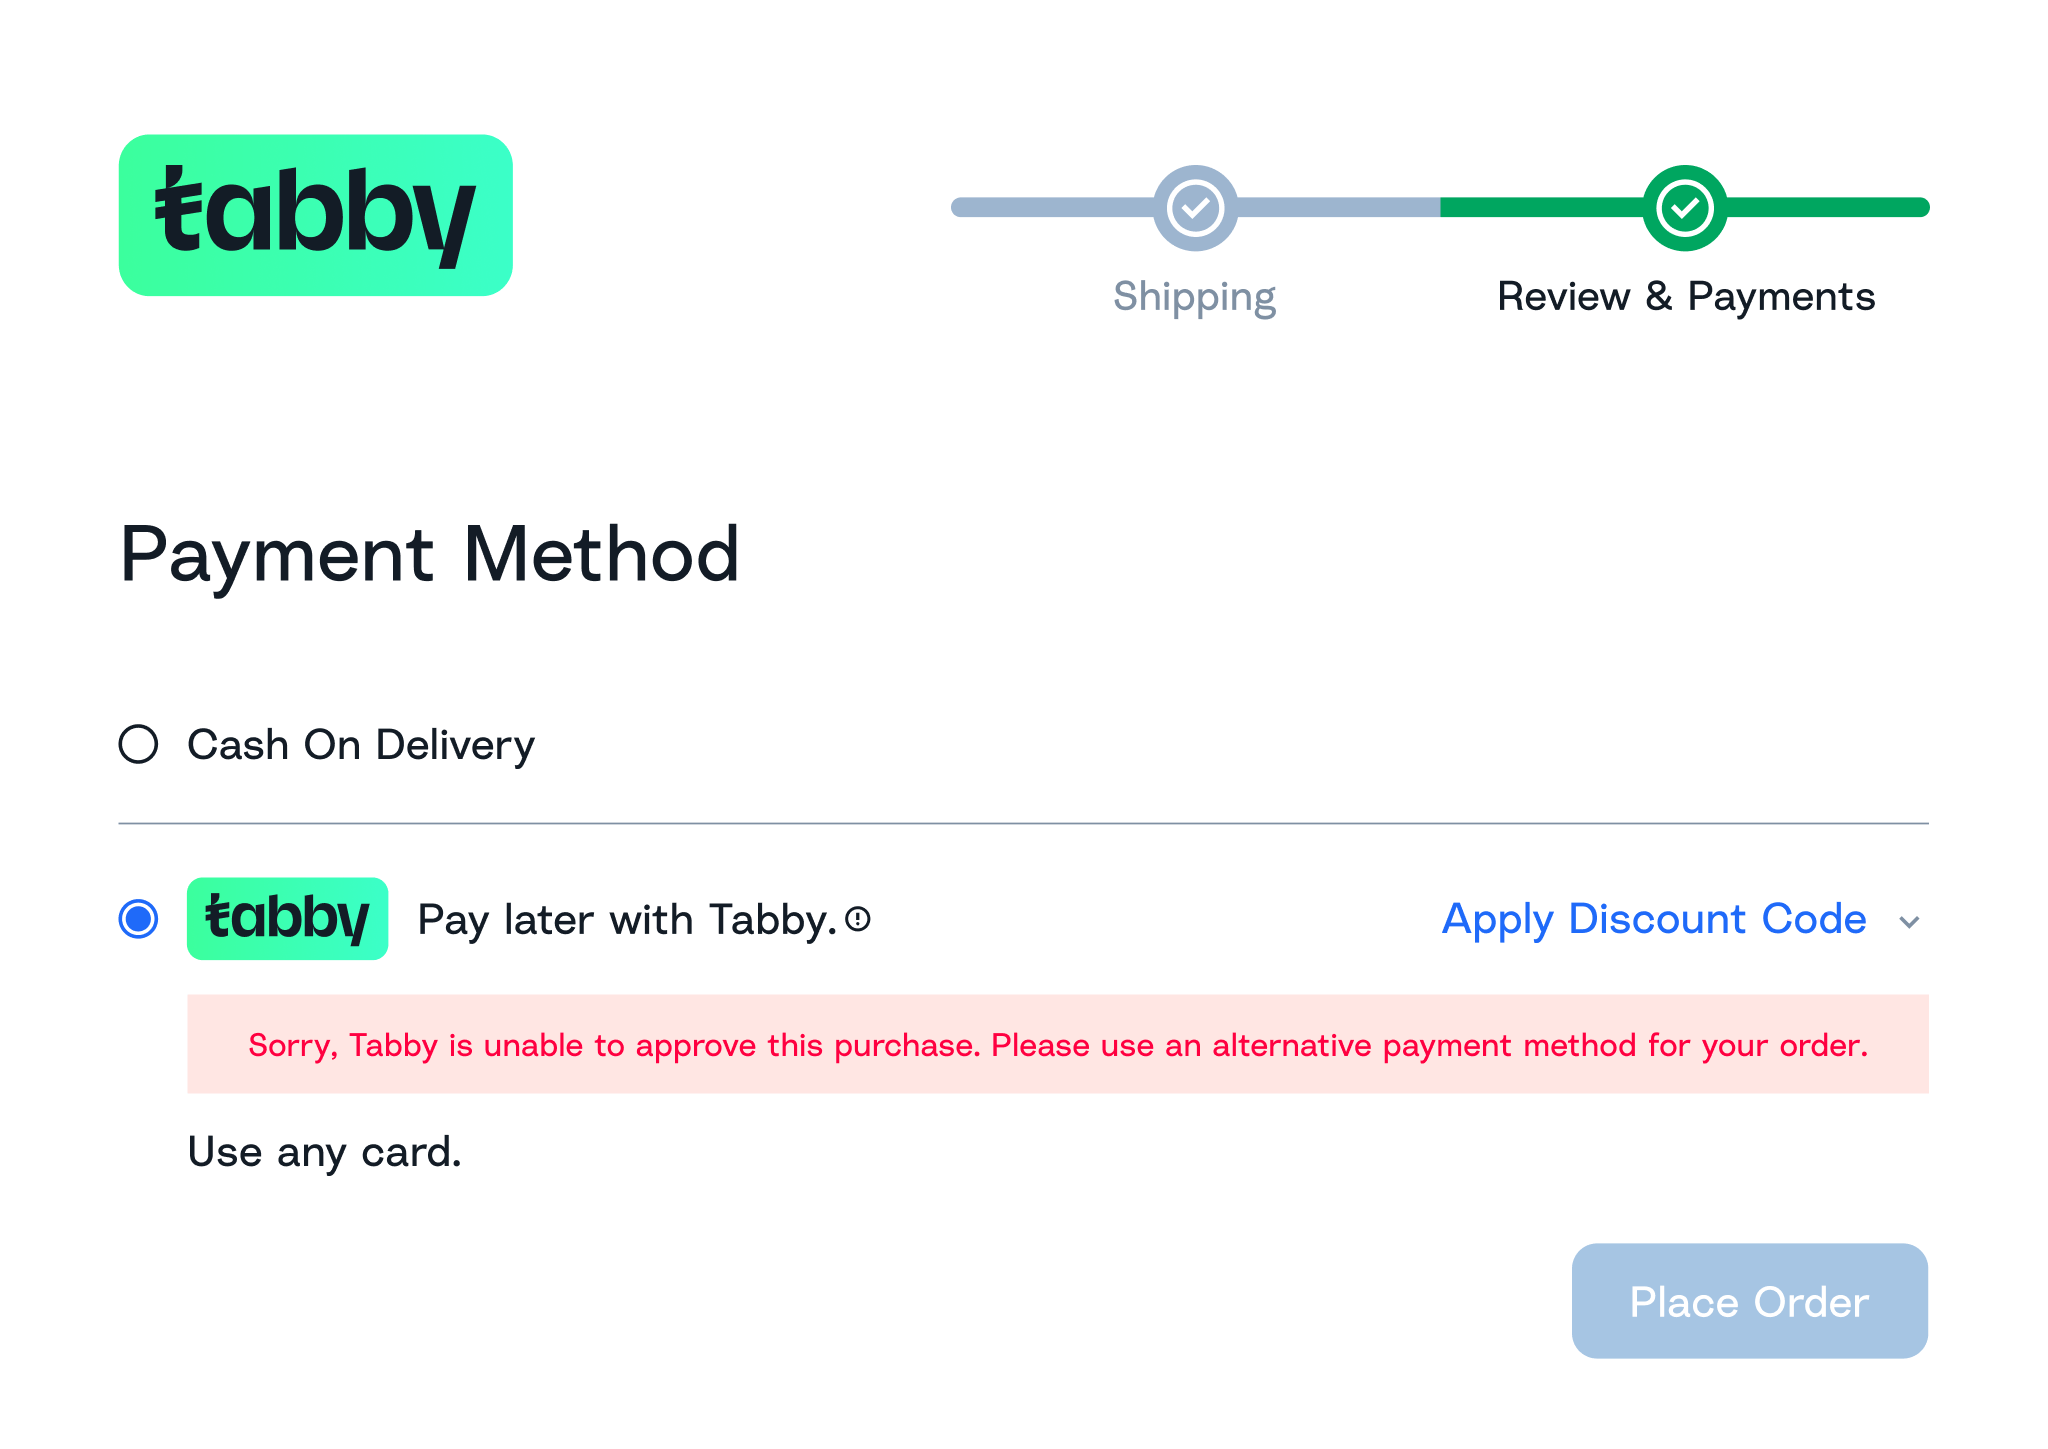
Show rejection message for ineligible customers
Eligibility Check vs Session Creation
Tabby’s Checkout API serves two distinct purposes. Here’s a side by side comparison:Checkout Session Initiation
When the customer who passed eligibility check clicks “Place order” with Tabby selected, call Checkout API with the full payload including all order details, items, shipping address, and merchant URLs. This is different from the eligibility check - you must now provide complete order information. The full request example with all required fields, and the response you get back, are in the Session payload model. Key principle: Use the same endpoint (POST /api/v2/checkout) but with different payload sizes for different purposes.
Response and Validation
In a successful response you will receivestatus, payment.id, and the HPP link to redirect the customer to. The link lives at:
installments is an array — take the first element. See the full response example.
This validation handles edge cases where:
- Cart amount or customer details changed between eligibility check and session creation;
- Customer was blacklisted between checks;
- Eligibility check timed out (fail-safe showed Tabby as available).
At Tabby Hosted Payment Page
At Tabby Checkout your customers will be asked:- To verify the phone number by OTP (each transaction);
- To link Apple Pay or regular card (only for new Tabby customers);
- Additional data may be asked during customer’s flow for some customers.
Redirection to the Store
When customers finish Tabby session, they are redirected to one of three URLs you provide in the session creation request, withpayment_id appended as a query parameter:
Handling redirects
- Redirect the customer immediately to avoid delays - do not block with payment status checks
- The redirect is a frontend navigation signal only. Verify payment status asynchronously on your backend via webhooks or
getPaymentAPI - Show “Confirming payment…” on Thank you page if status is pending, update once backend confirms final status
Approved messages for redirects
The following messages can be used to show to customers after a redirect:Allowed characters in redirect URLs (“success”, “cancel”, “failure”)
- Latin letters (a-z, A-Z)
- Arabic letters (ء-ي)
- Digits (0-9)
- Special characters - \ | / : ;., + {}? & @ = # %